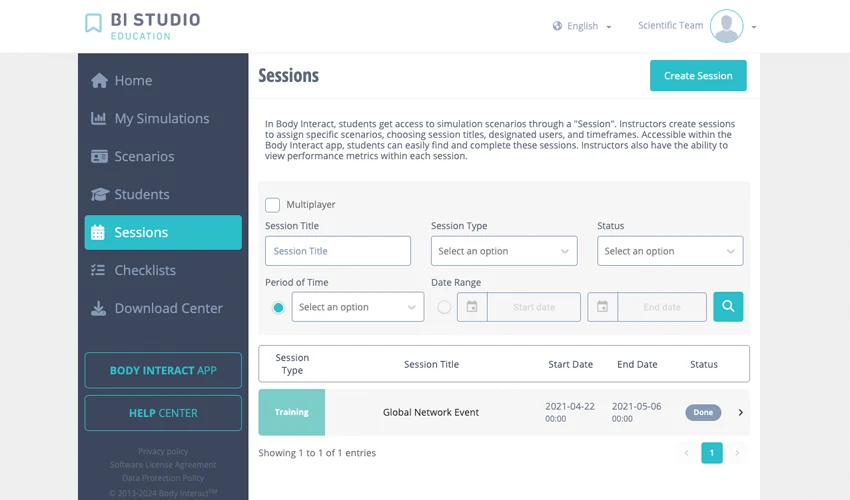
Creating a session allows you to assign simulation scenarios to your students in Body Interact.
How to Create a Session in Body Interact
(assign simulations to students)
1. Log in to BI Studio
Access your account on BI Studio: studio.bodyinteract.com with the same Body Interact credentials.
2. Navigate to Sessions
Click on the “Sessions” tab on the left side of the screen.

3. Create a Session
Click the “Create a Session” button
4. Define Session Type
Choose your session type. You can choose to set up a Training, Evaluation or OSCE session.
5. Select Scenarios
Pick the virtual patient scenarios you want to assign to your students. Use the filter options for an easier search.
6. Customize Settings
Adjust pre- and post-simulation settings as needed.
7. Assign Students
Select the students to include in the session.
8. Add Notes (optional)
Include customized pre-simulation notes for students.
9. Set Title and Dates
Enter a session title and select the time and date range.
And that’s it! Once the session is saved, your students can access their simulations through their Body Interact accounts. Additionally, you can choose to send an automatic email notification to inform them about the new session.


